Proxy Management
Nstbrowser supports both built-in integrated proxies and custom proxies.
It also supports mainstream proxy setups on the market, including HTTP / HTTPS / SOCKS5 proxy types.
Built-in Integrated Proxy
1. Use Integrated Proxy When Creating or Editing a Profile
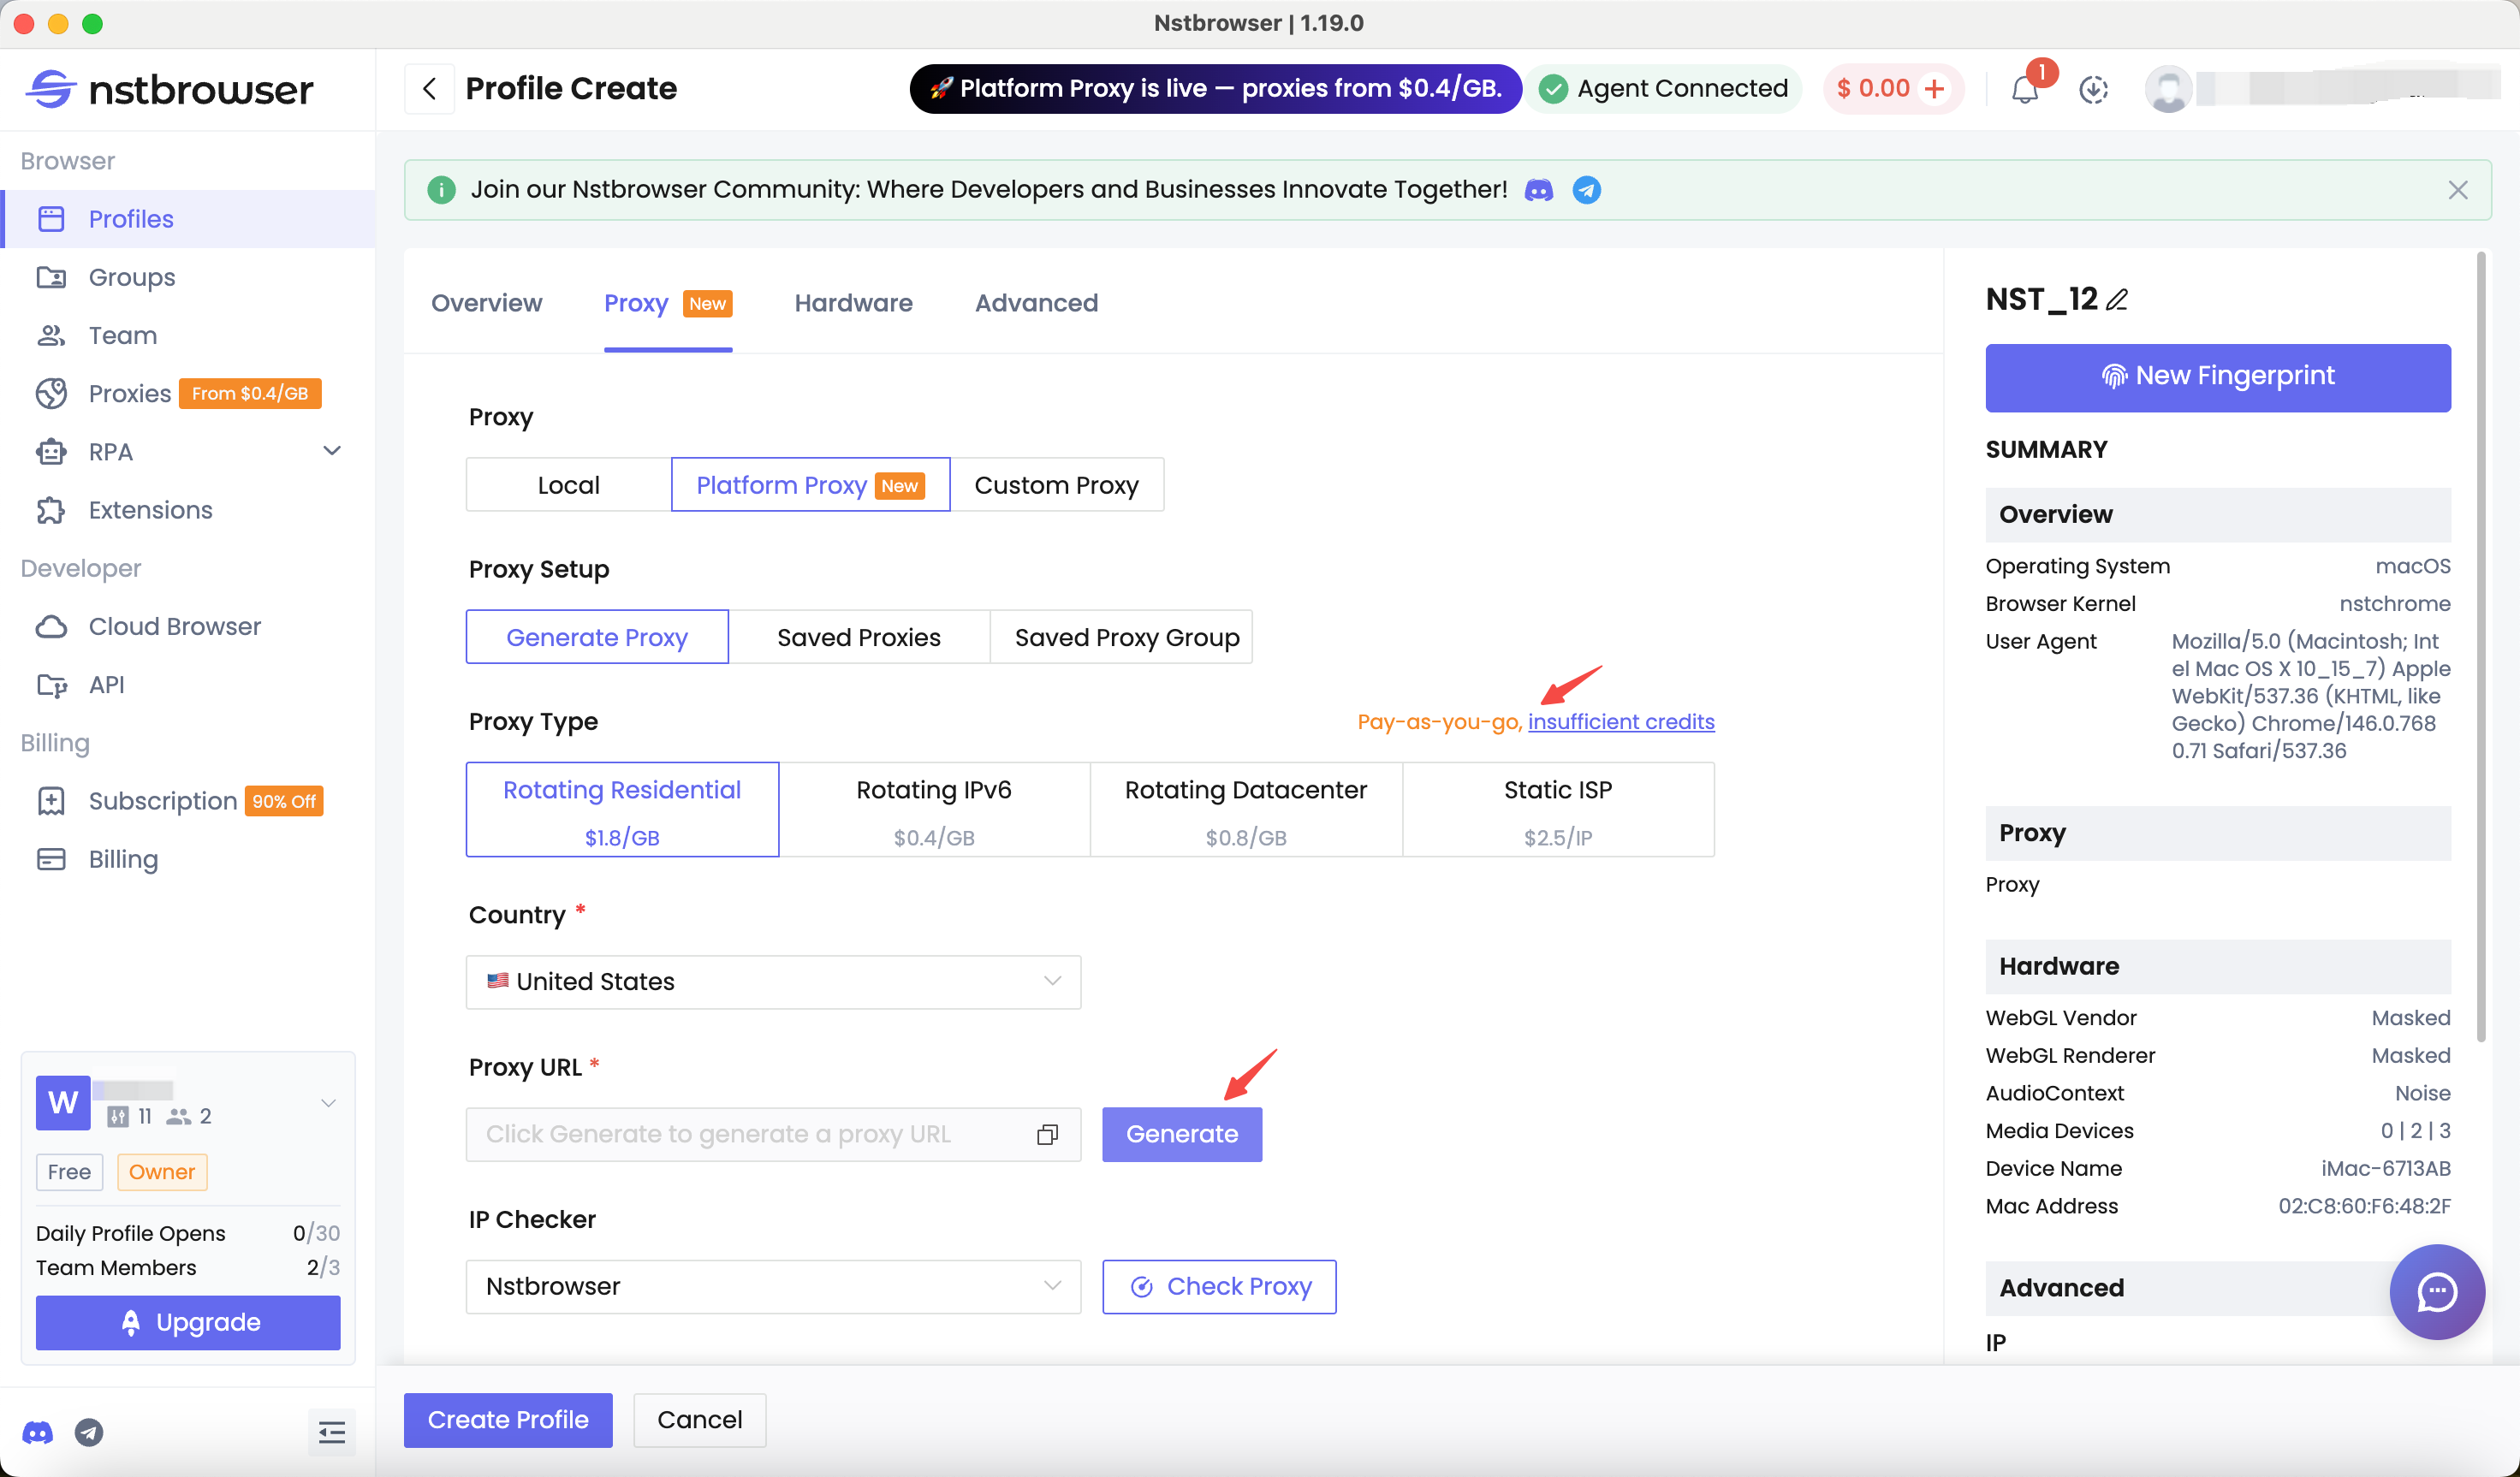
Entry: while creating or editing a Profile, choose Platform Proxy and click Generate Proxy to open the proxy configuration flow.
- Generate Proxy: generate a new built-in integrated proxy
- Saved Proxies: choose a saved proxy
- Saved Proxy Group: choose a saved proxy group
- Select proxy type Built-in integrated proxies currently support 4 types:
Rotating ResidentialRotating IPv6Rotating DatacenterStatic ISP
- Select proxy country After choosing the proxy type, select the target country.
World Wideis also supported, which lets the system randomly assign a country when generating the proxy.
- Generate proxy After selecting the proper configuration for your scenario, click
Generateto create the proxy. - Save proxy (optional) After generation, you can save the proxy into a
Proxiesgroup. Saved proxies can be reused later when creating or editing other Profiles, so multiple Profiles can share the same proxy. - Billing notes
Rotating Residential/IPv6/Datacenter: billed by usage. Charges are deducted from your account balance based on actual traffic or consumption. Make sure your balance is sufficient to avoid service interruption.Static ISP: must be purchased before it can be generated and assigned to a Profile. Because these resources are unique, purchased ISP proxies do not support refunds or IP replacement.
2. Manage or Purchase Built-in Integrated Proxies
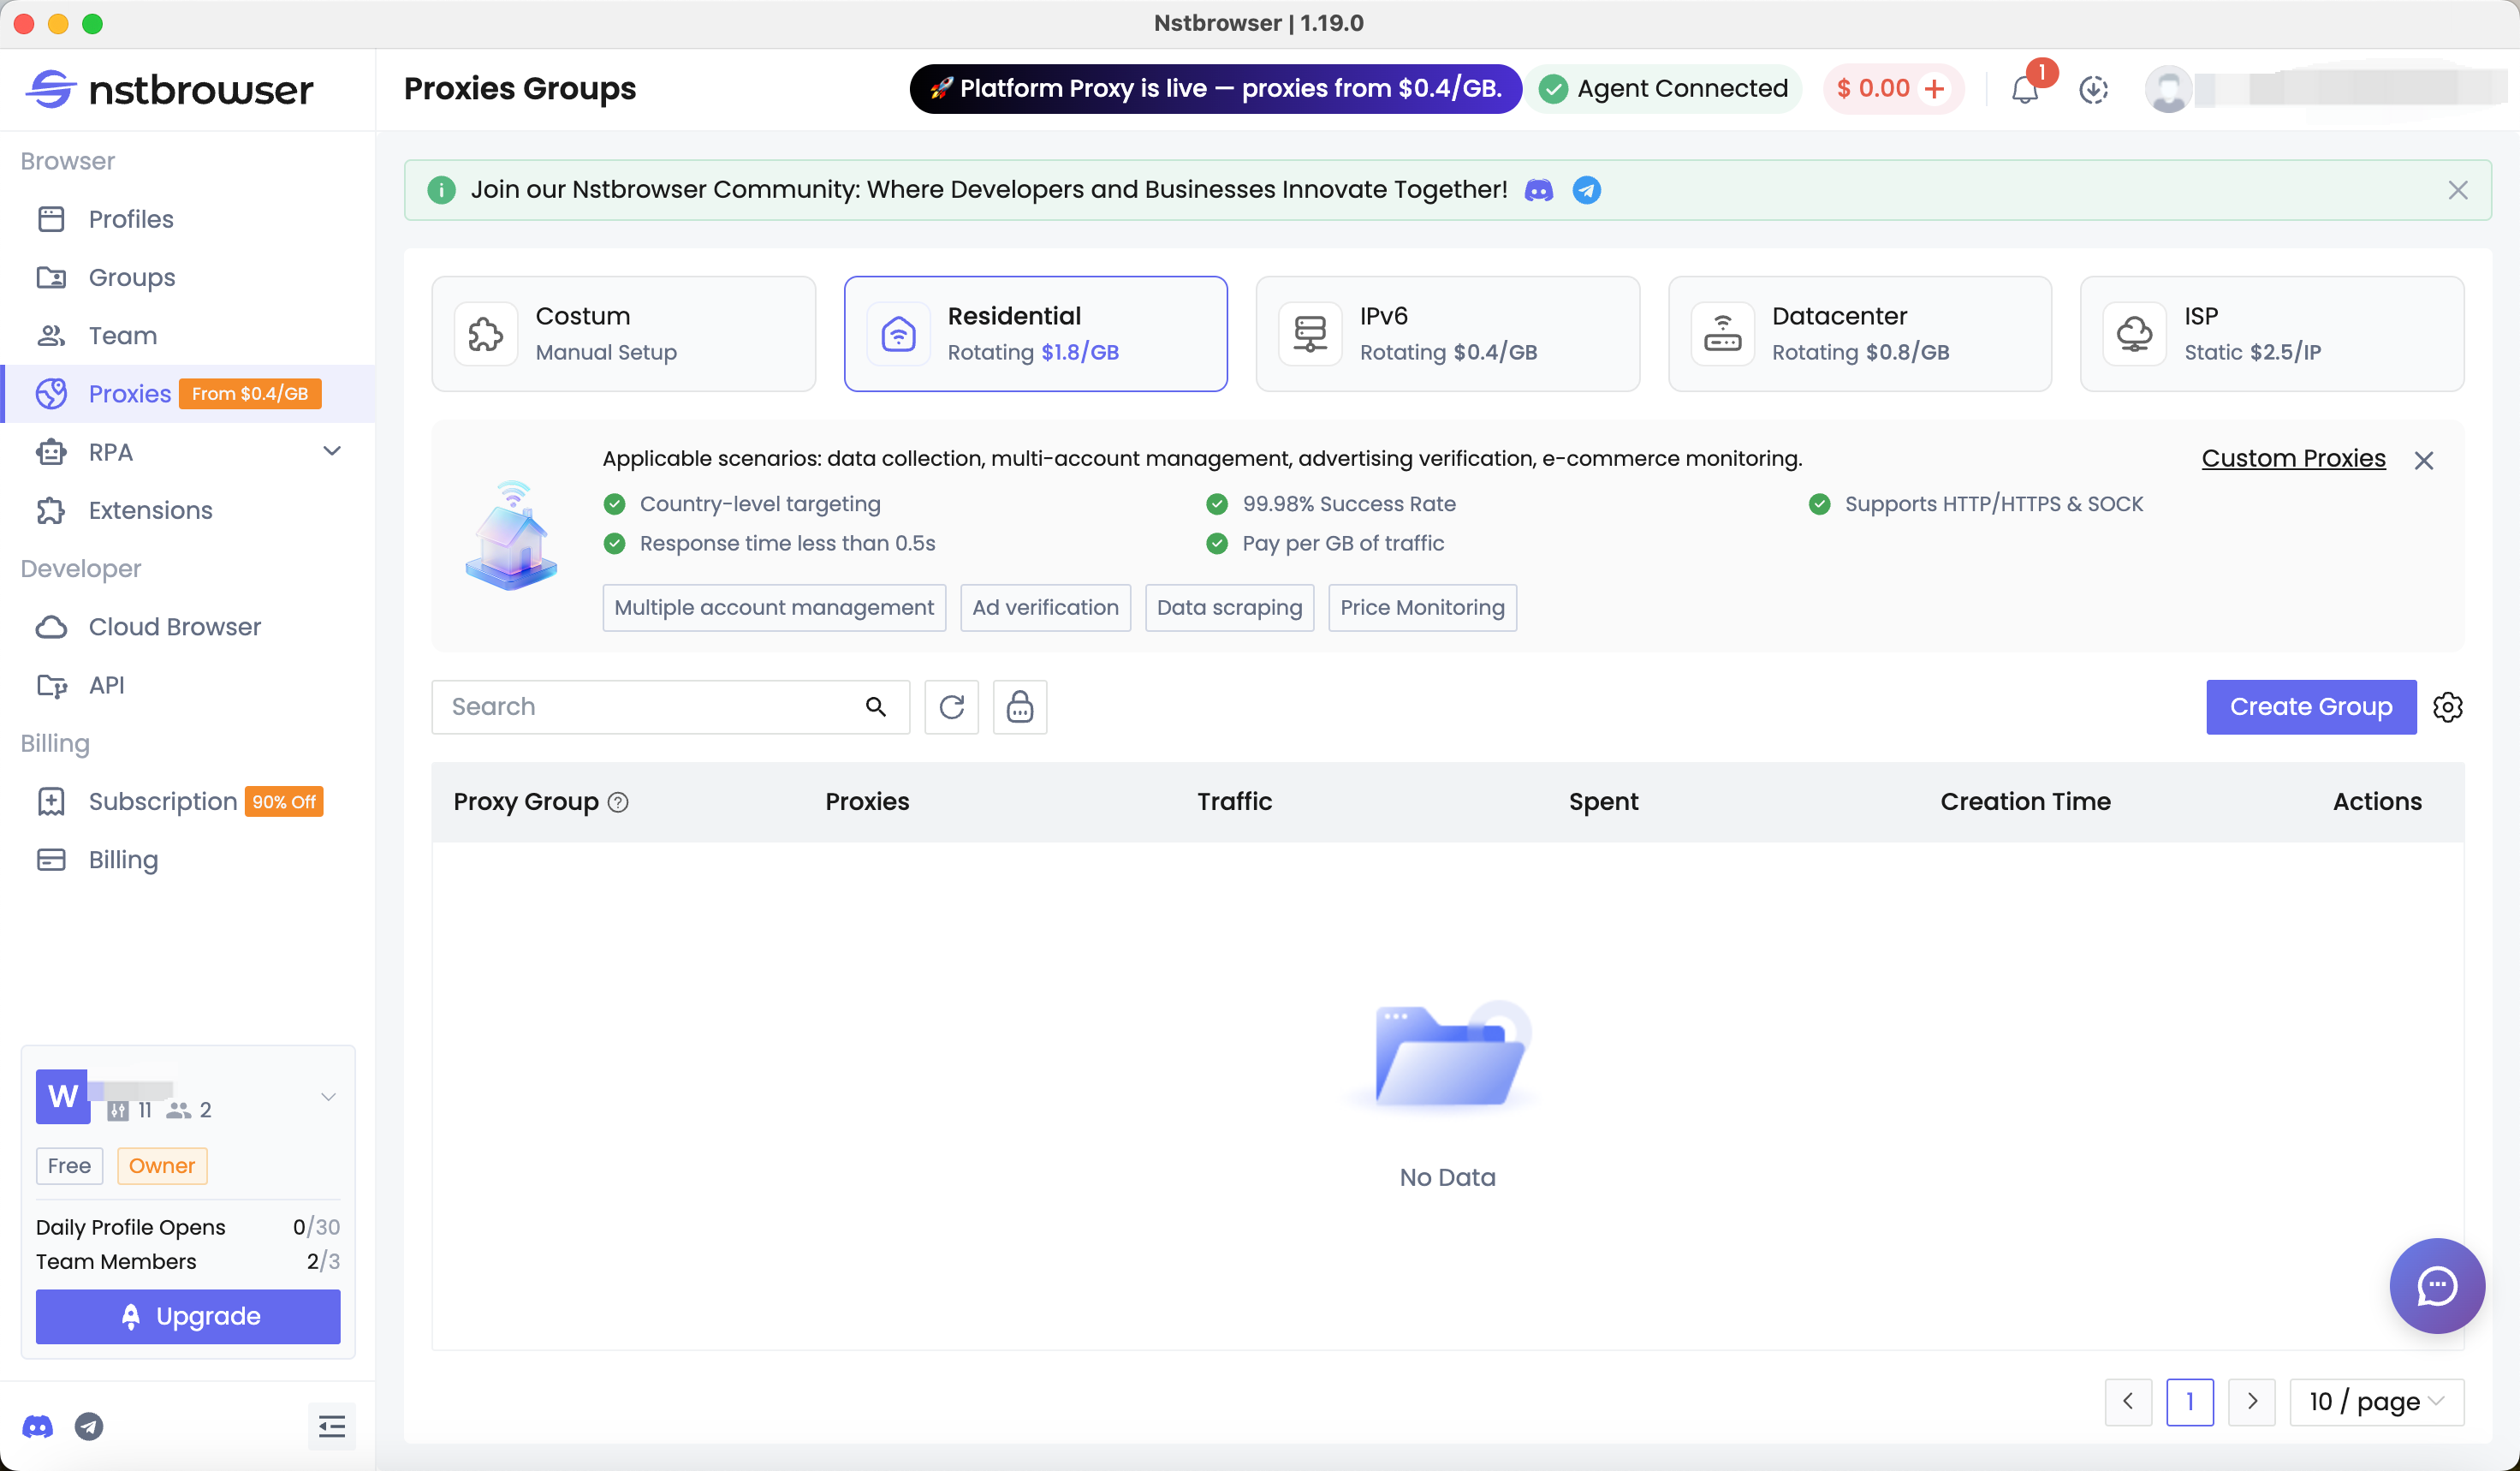
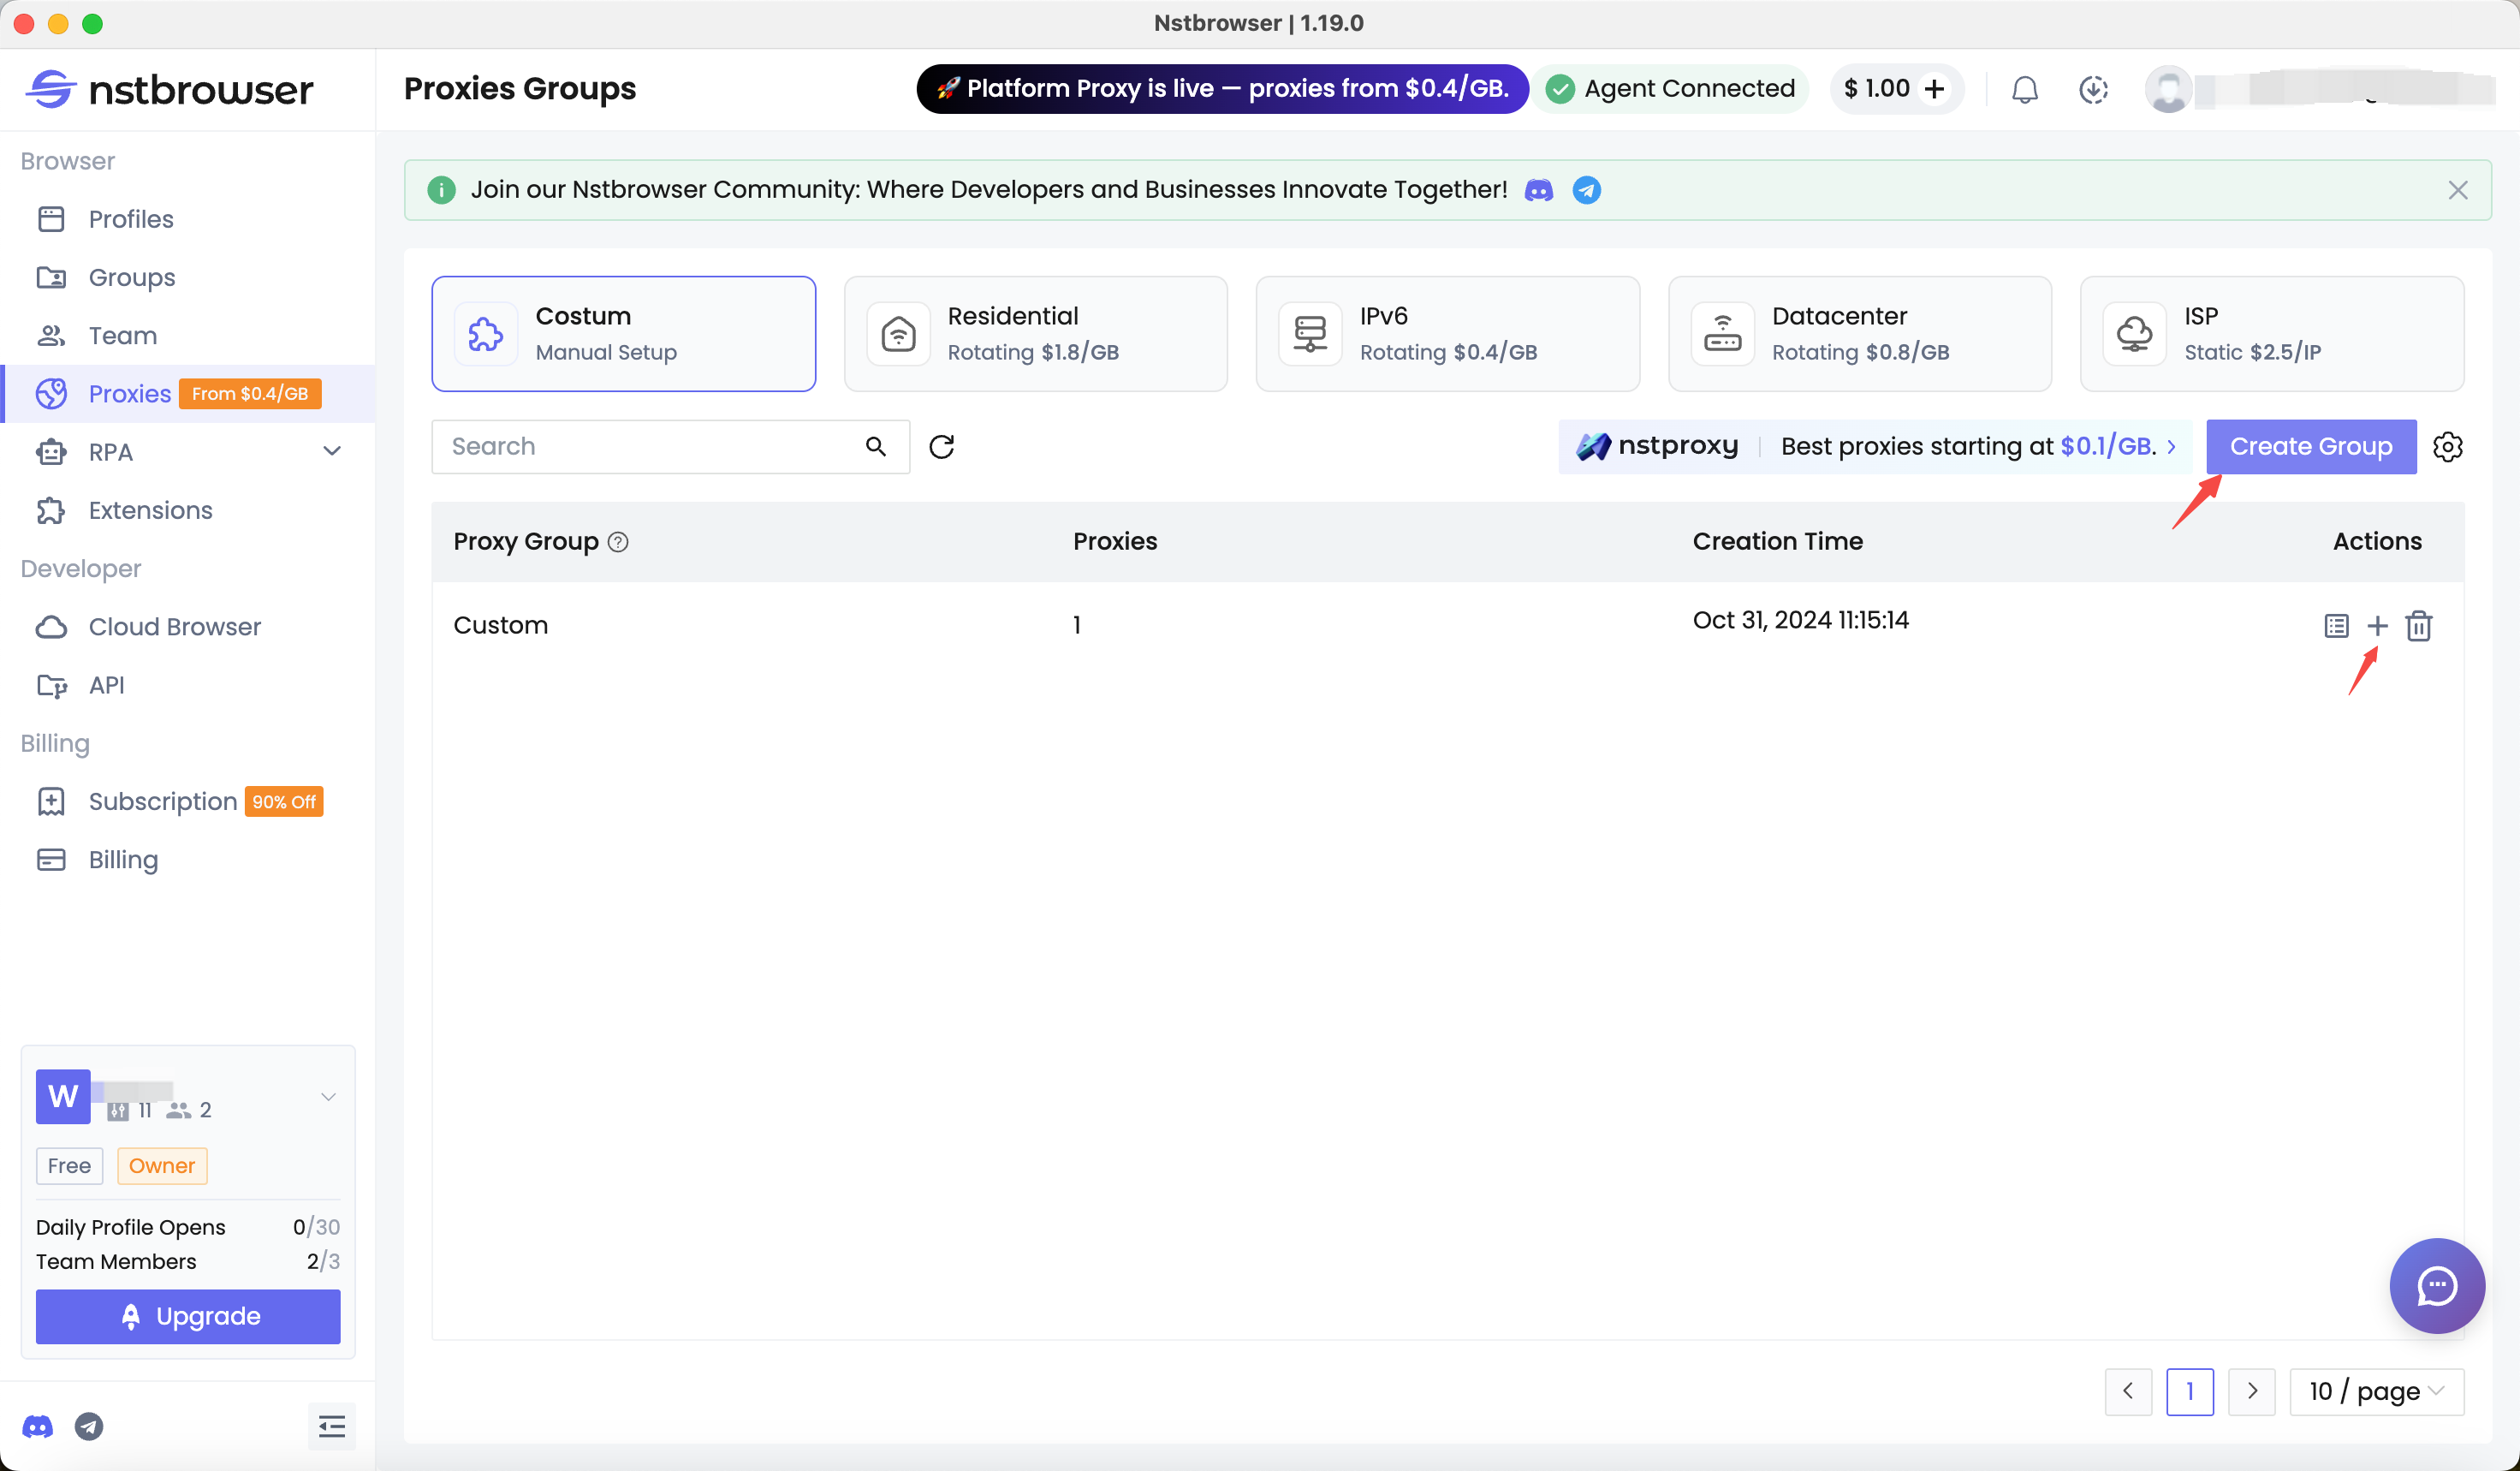
Entry: open Proxies from the left sidebar navigation to access the proxy management page.
On the Proxies page, you can manage both your custom proxies and your purchased built-in proxies in one place.
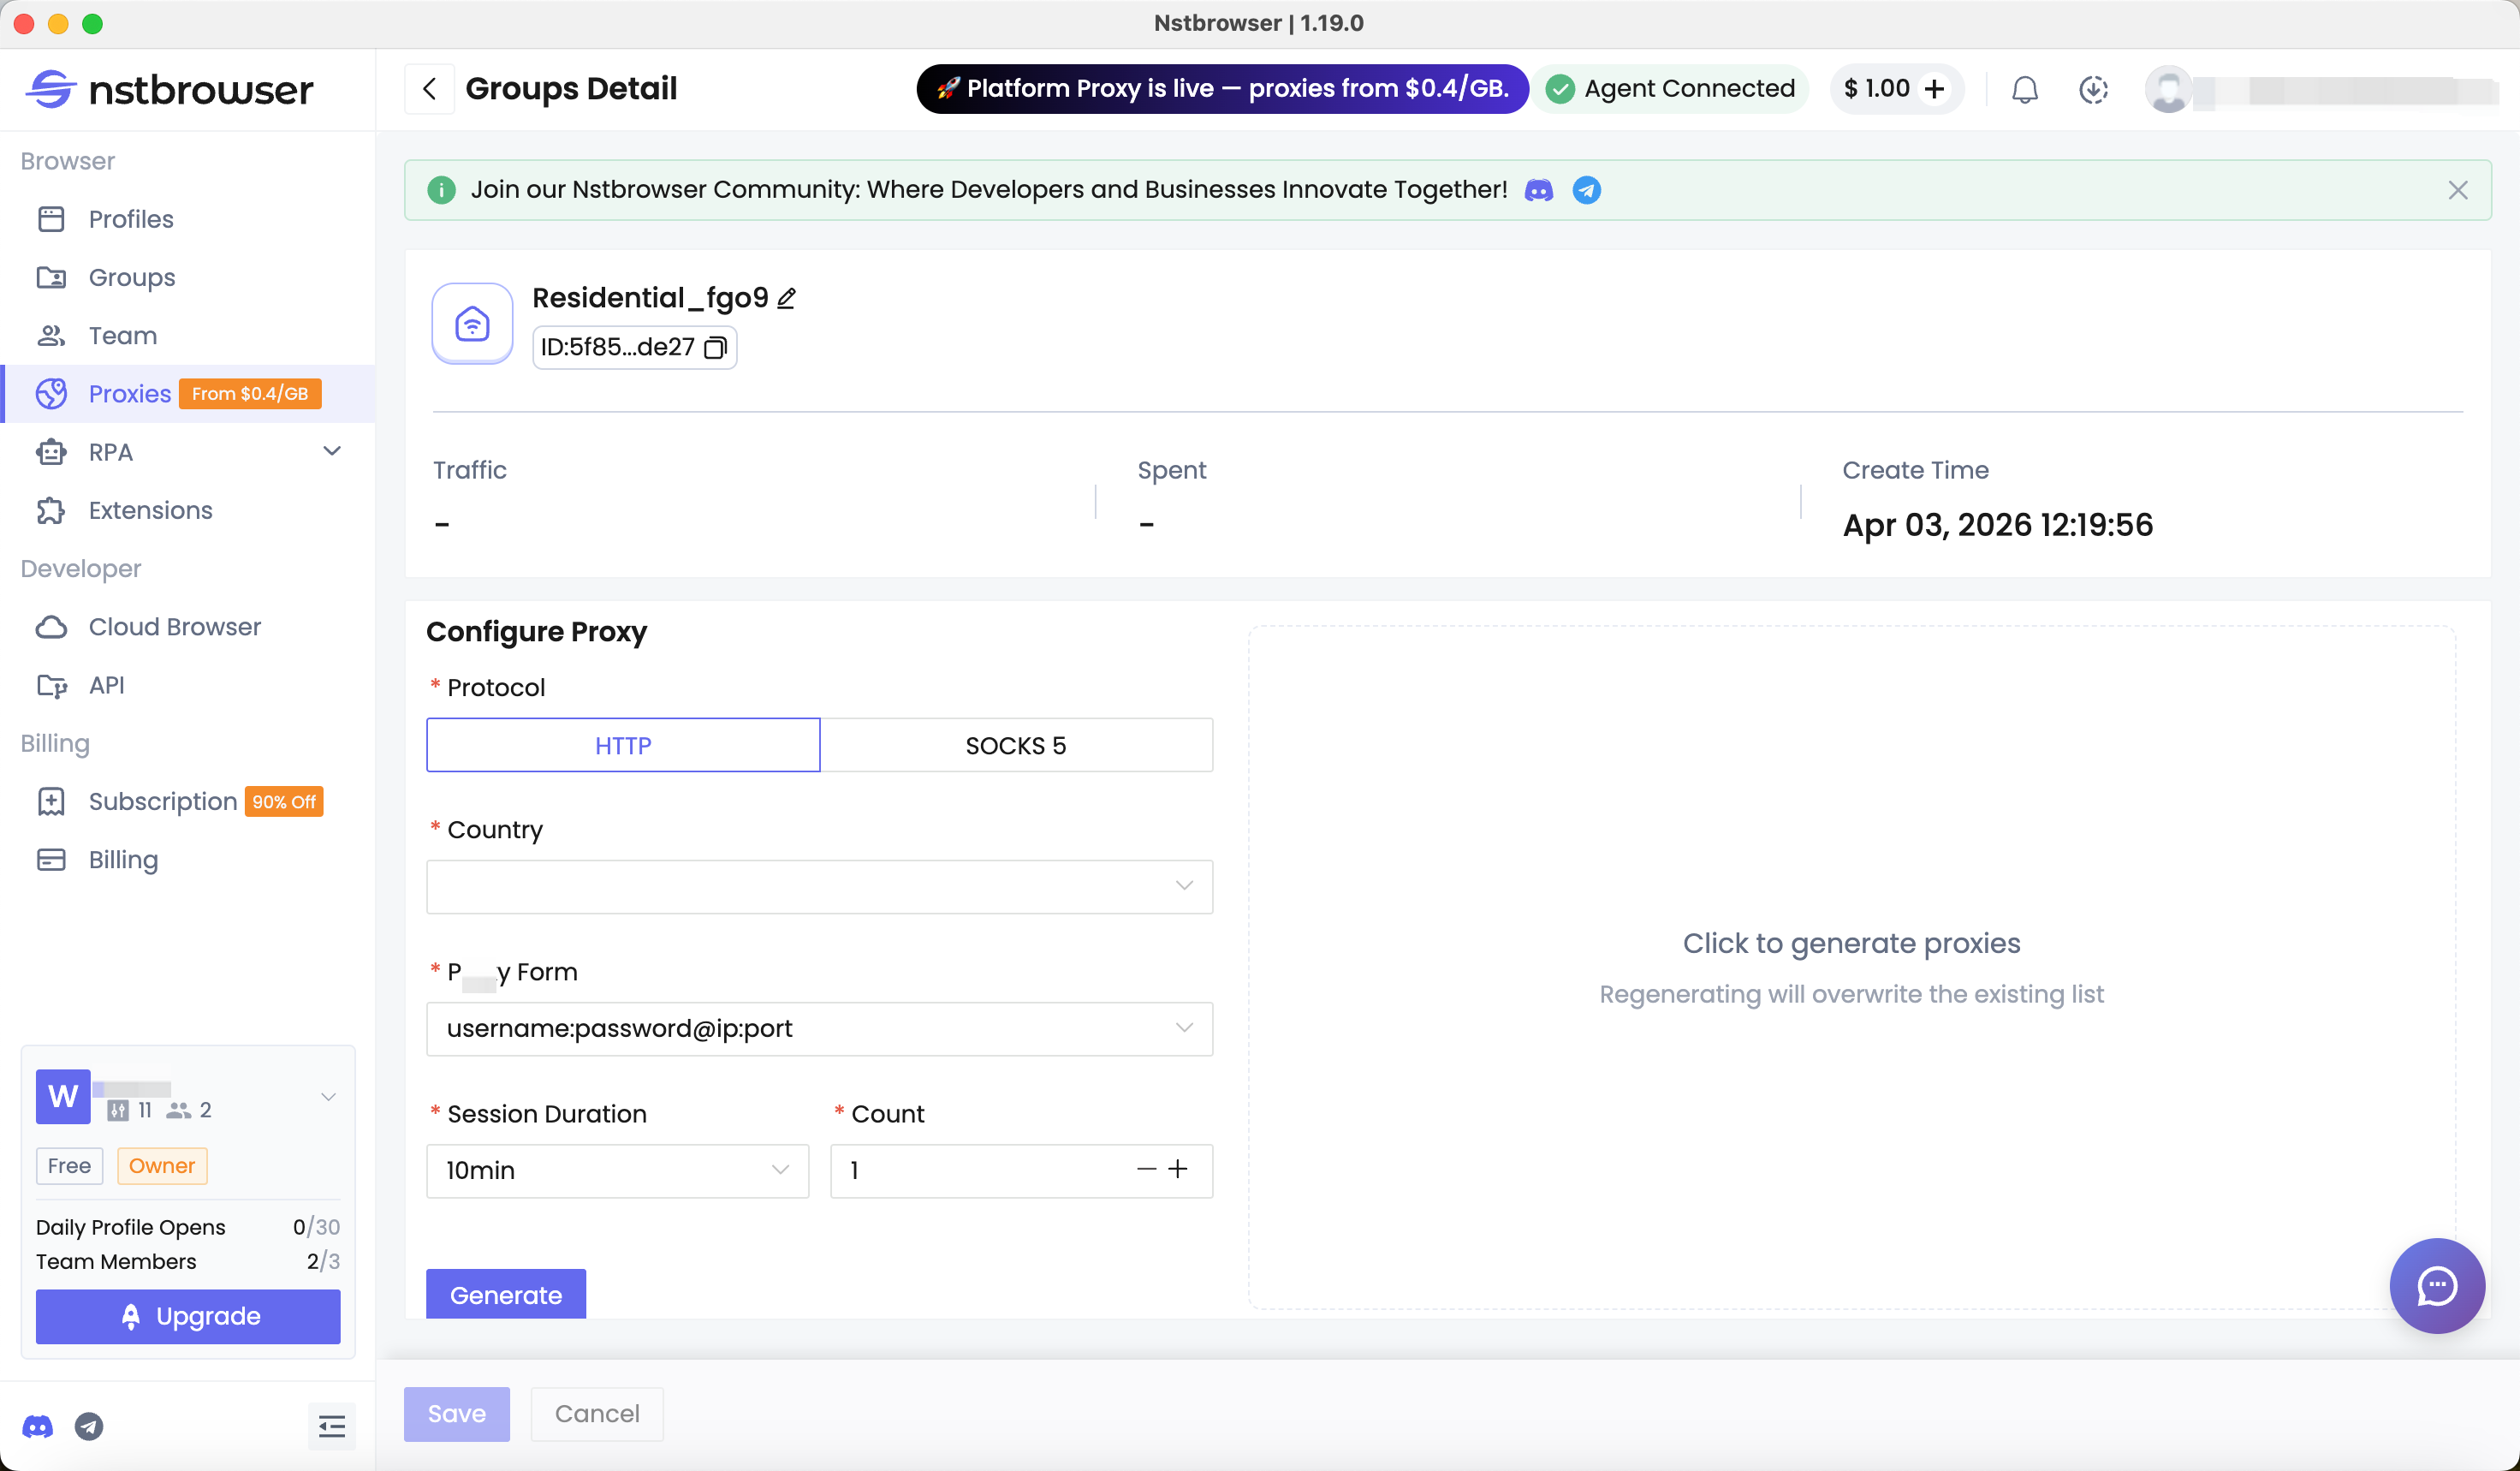
- Choose the proxy type you want to purchase and click
Create Groupto create the proxy group. - Before creating proxies, make sure your account balance is sufficient.
- After the group is created, open the group detail page and configure the parameters you need before generating proxies. Available parameters include:
Protocol: choose the proxy protocol, such as HTTP(S) or SOCKS5, based on compatibility and usage requirementsCountry: choose the country used for proxy generationProxy Form: define the output or usage format of the generated proxy for different tools or integration formatsSession Duration: session lifetime, for example1m,5m,60mCount: the number of proxies to generate at once, up to 100
Channel Password: updating the password resets the proxy validity period and invalidates all previously generated proxy URLs, including URLs already used in Profiles. Affected Profiles must be reconfigured.
Custom Proxy
1. Use Custom Proxy When Creating or Editing a Profile
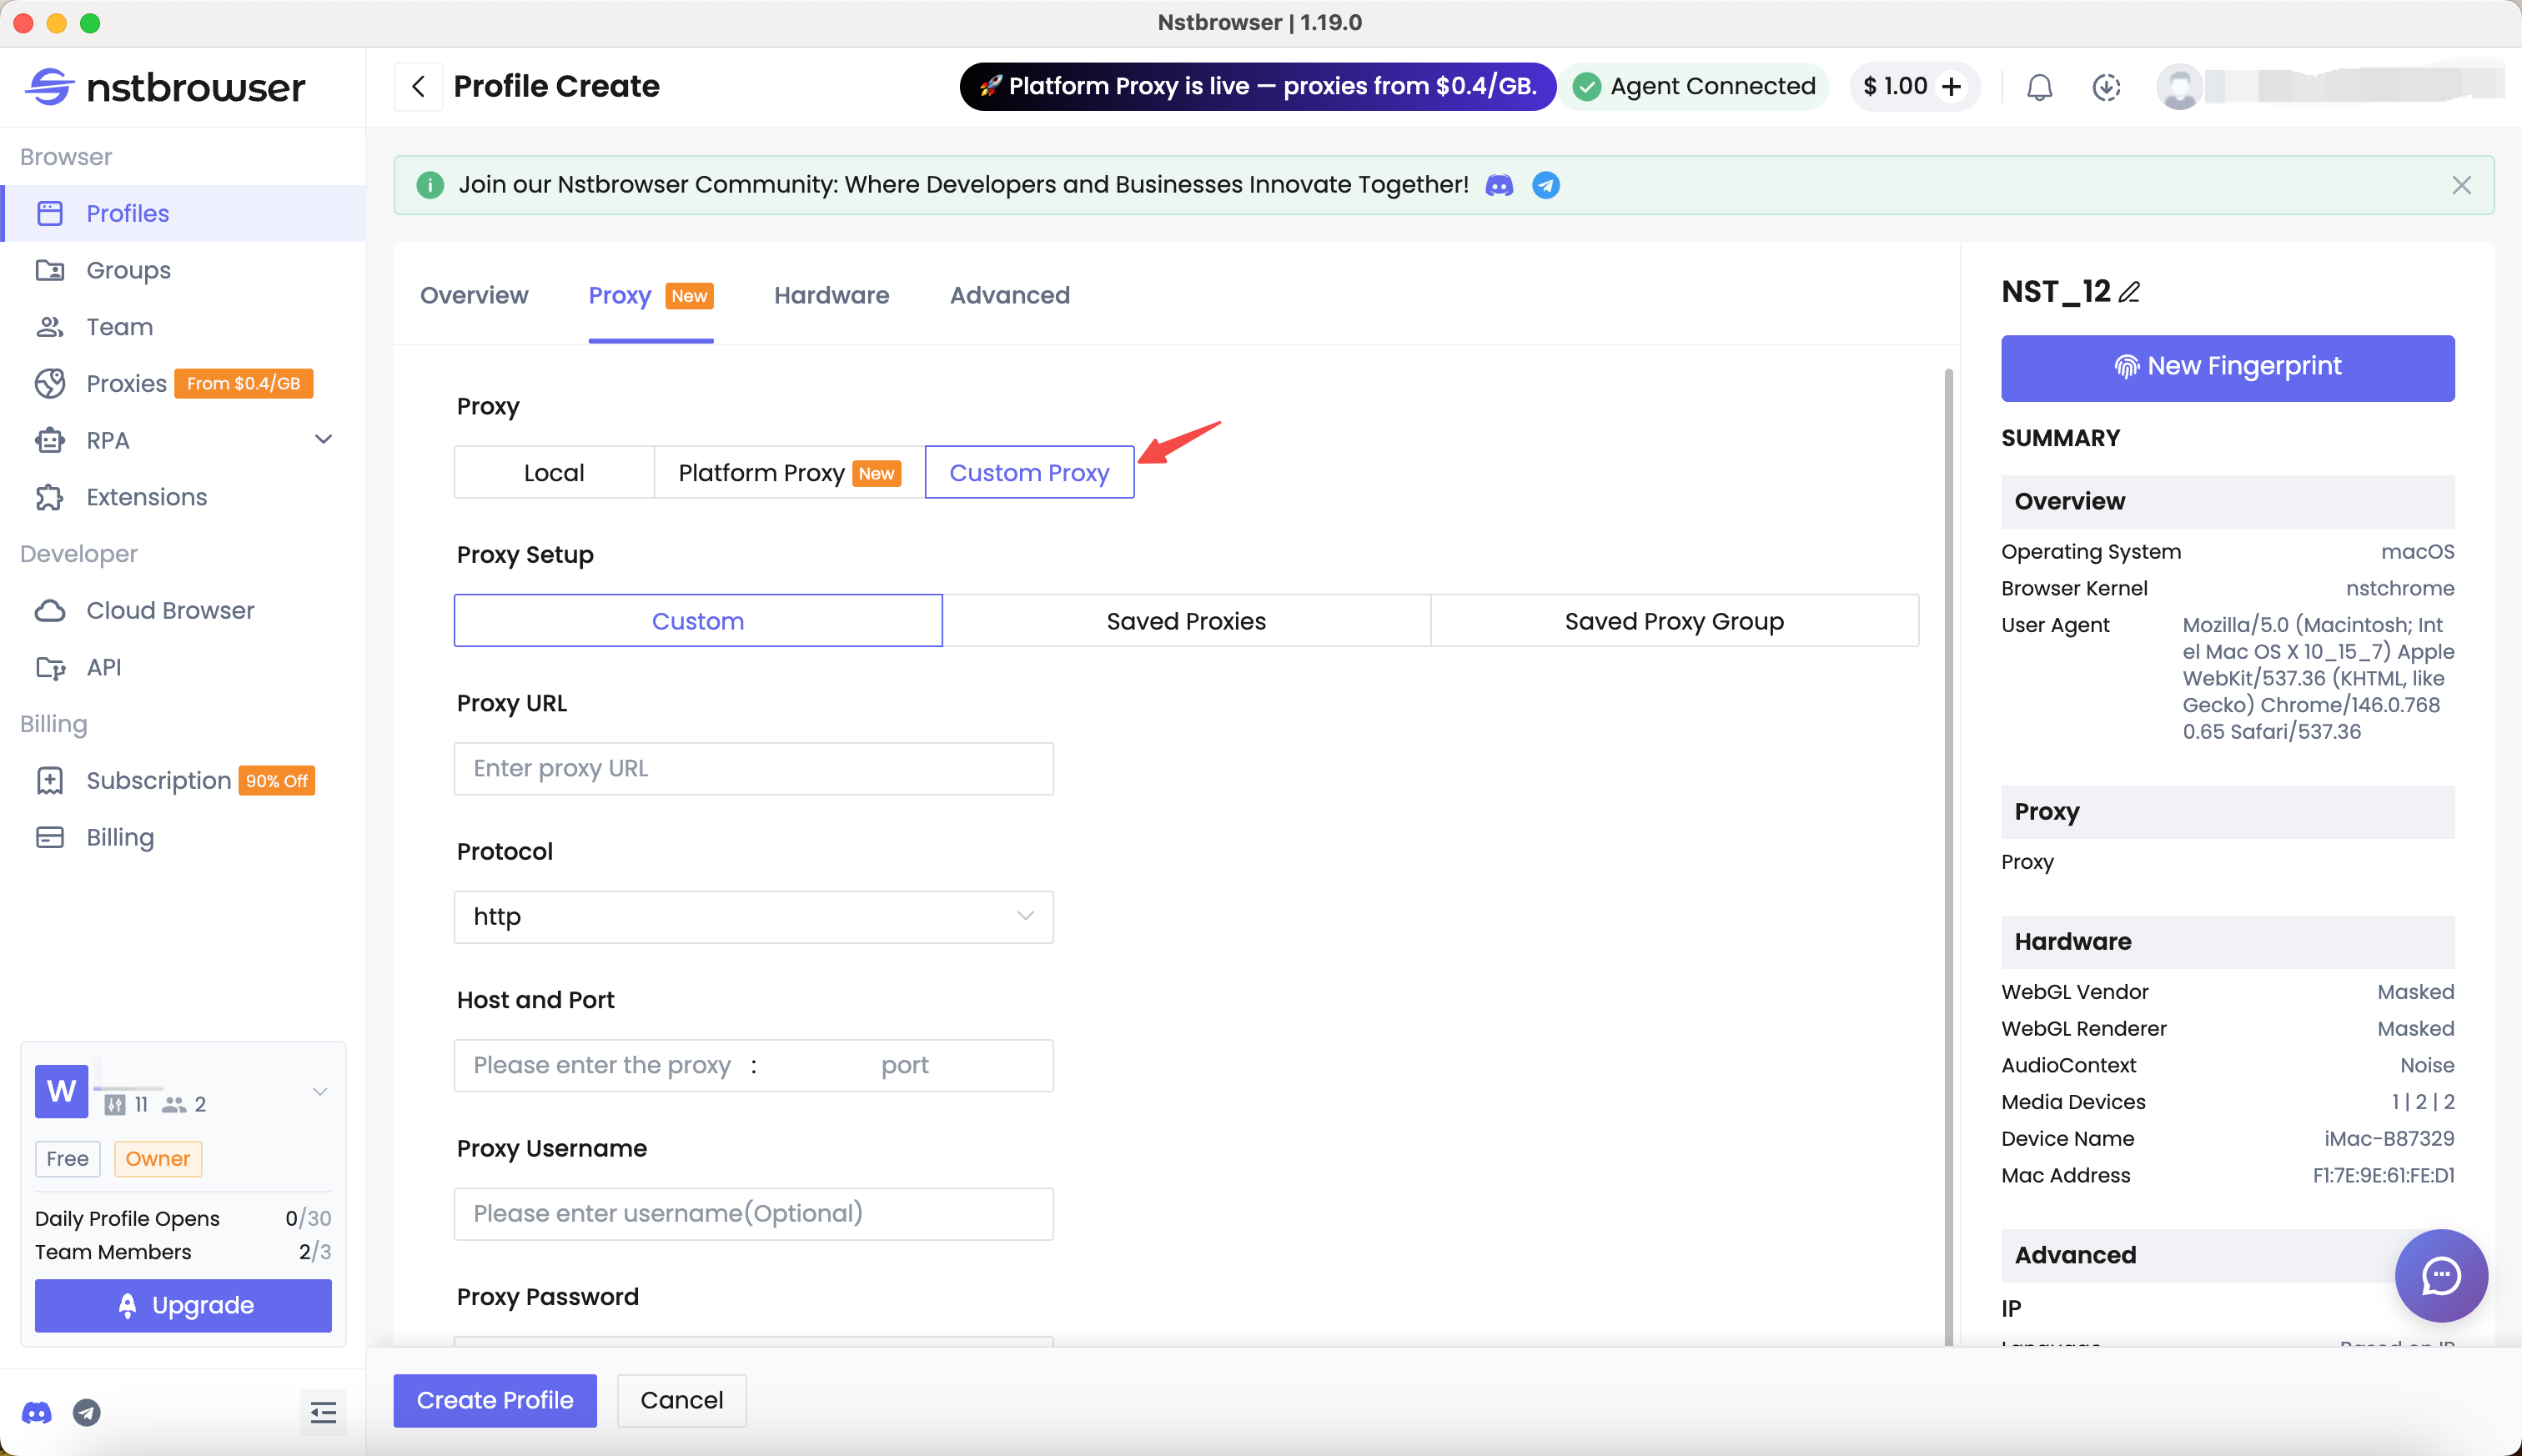
Entry: while creating or editing a Profile, choose Custom Proxy.
- Paste the proxy URL and the system will automatically parse it and fill the related fields.
HTTP/HTTPS: enter the proxy details provided by your proxy provider (proxy host:proxy port:proxy account:proxy password).Socks5: add thesocks5://prefix before the proxy information (socks5://proxy host:proxy port:proxy account:proxy password).
2. Manage or Add Custom Proxies
Entry: open Proxies from the left sidebar navigation to access the proxy management page.
On the Proxies page, you can centrally manage all custom proxies you have added.
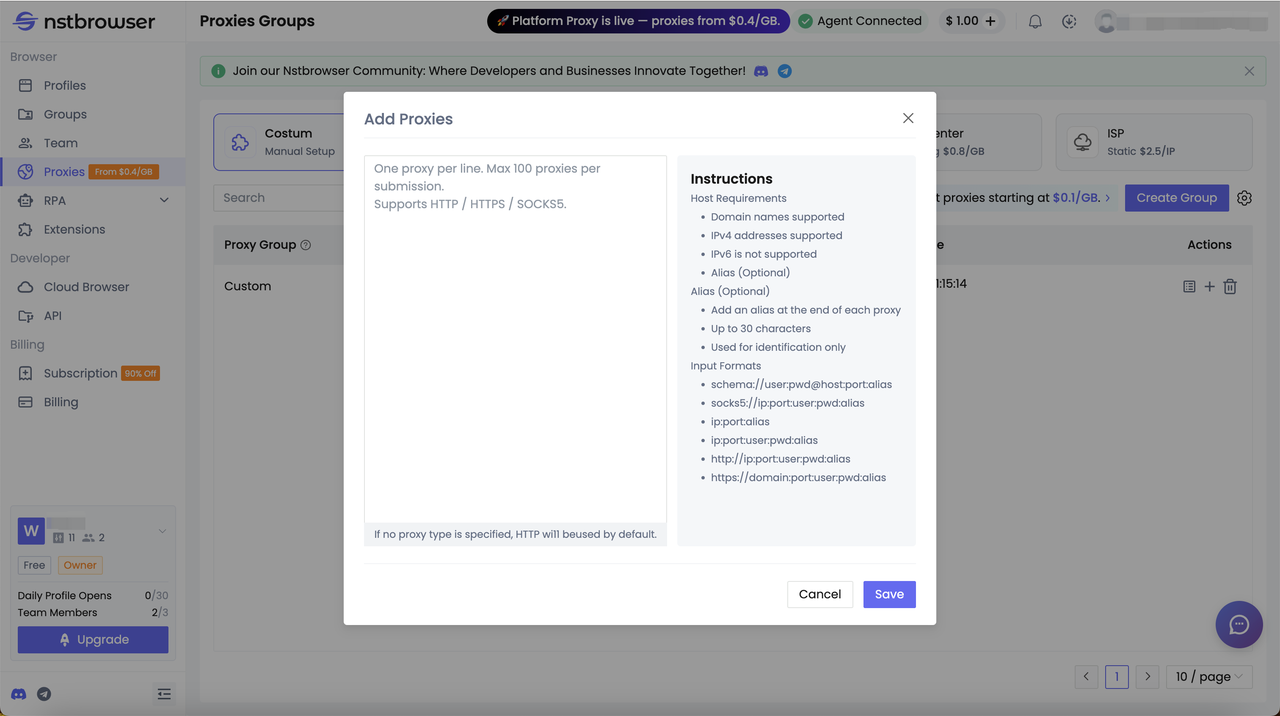
- Click
Create Groupto create a new proxy group. Then add or edit proxies inside that group.- Deleting a group will also delete every proxy inside it. If any existing Profile is using a proxy from that group, the proxy setting in that Profile will also be cleared.
- Click
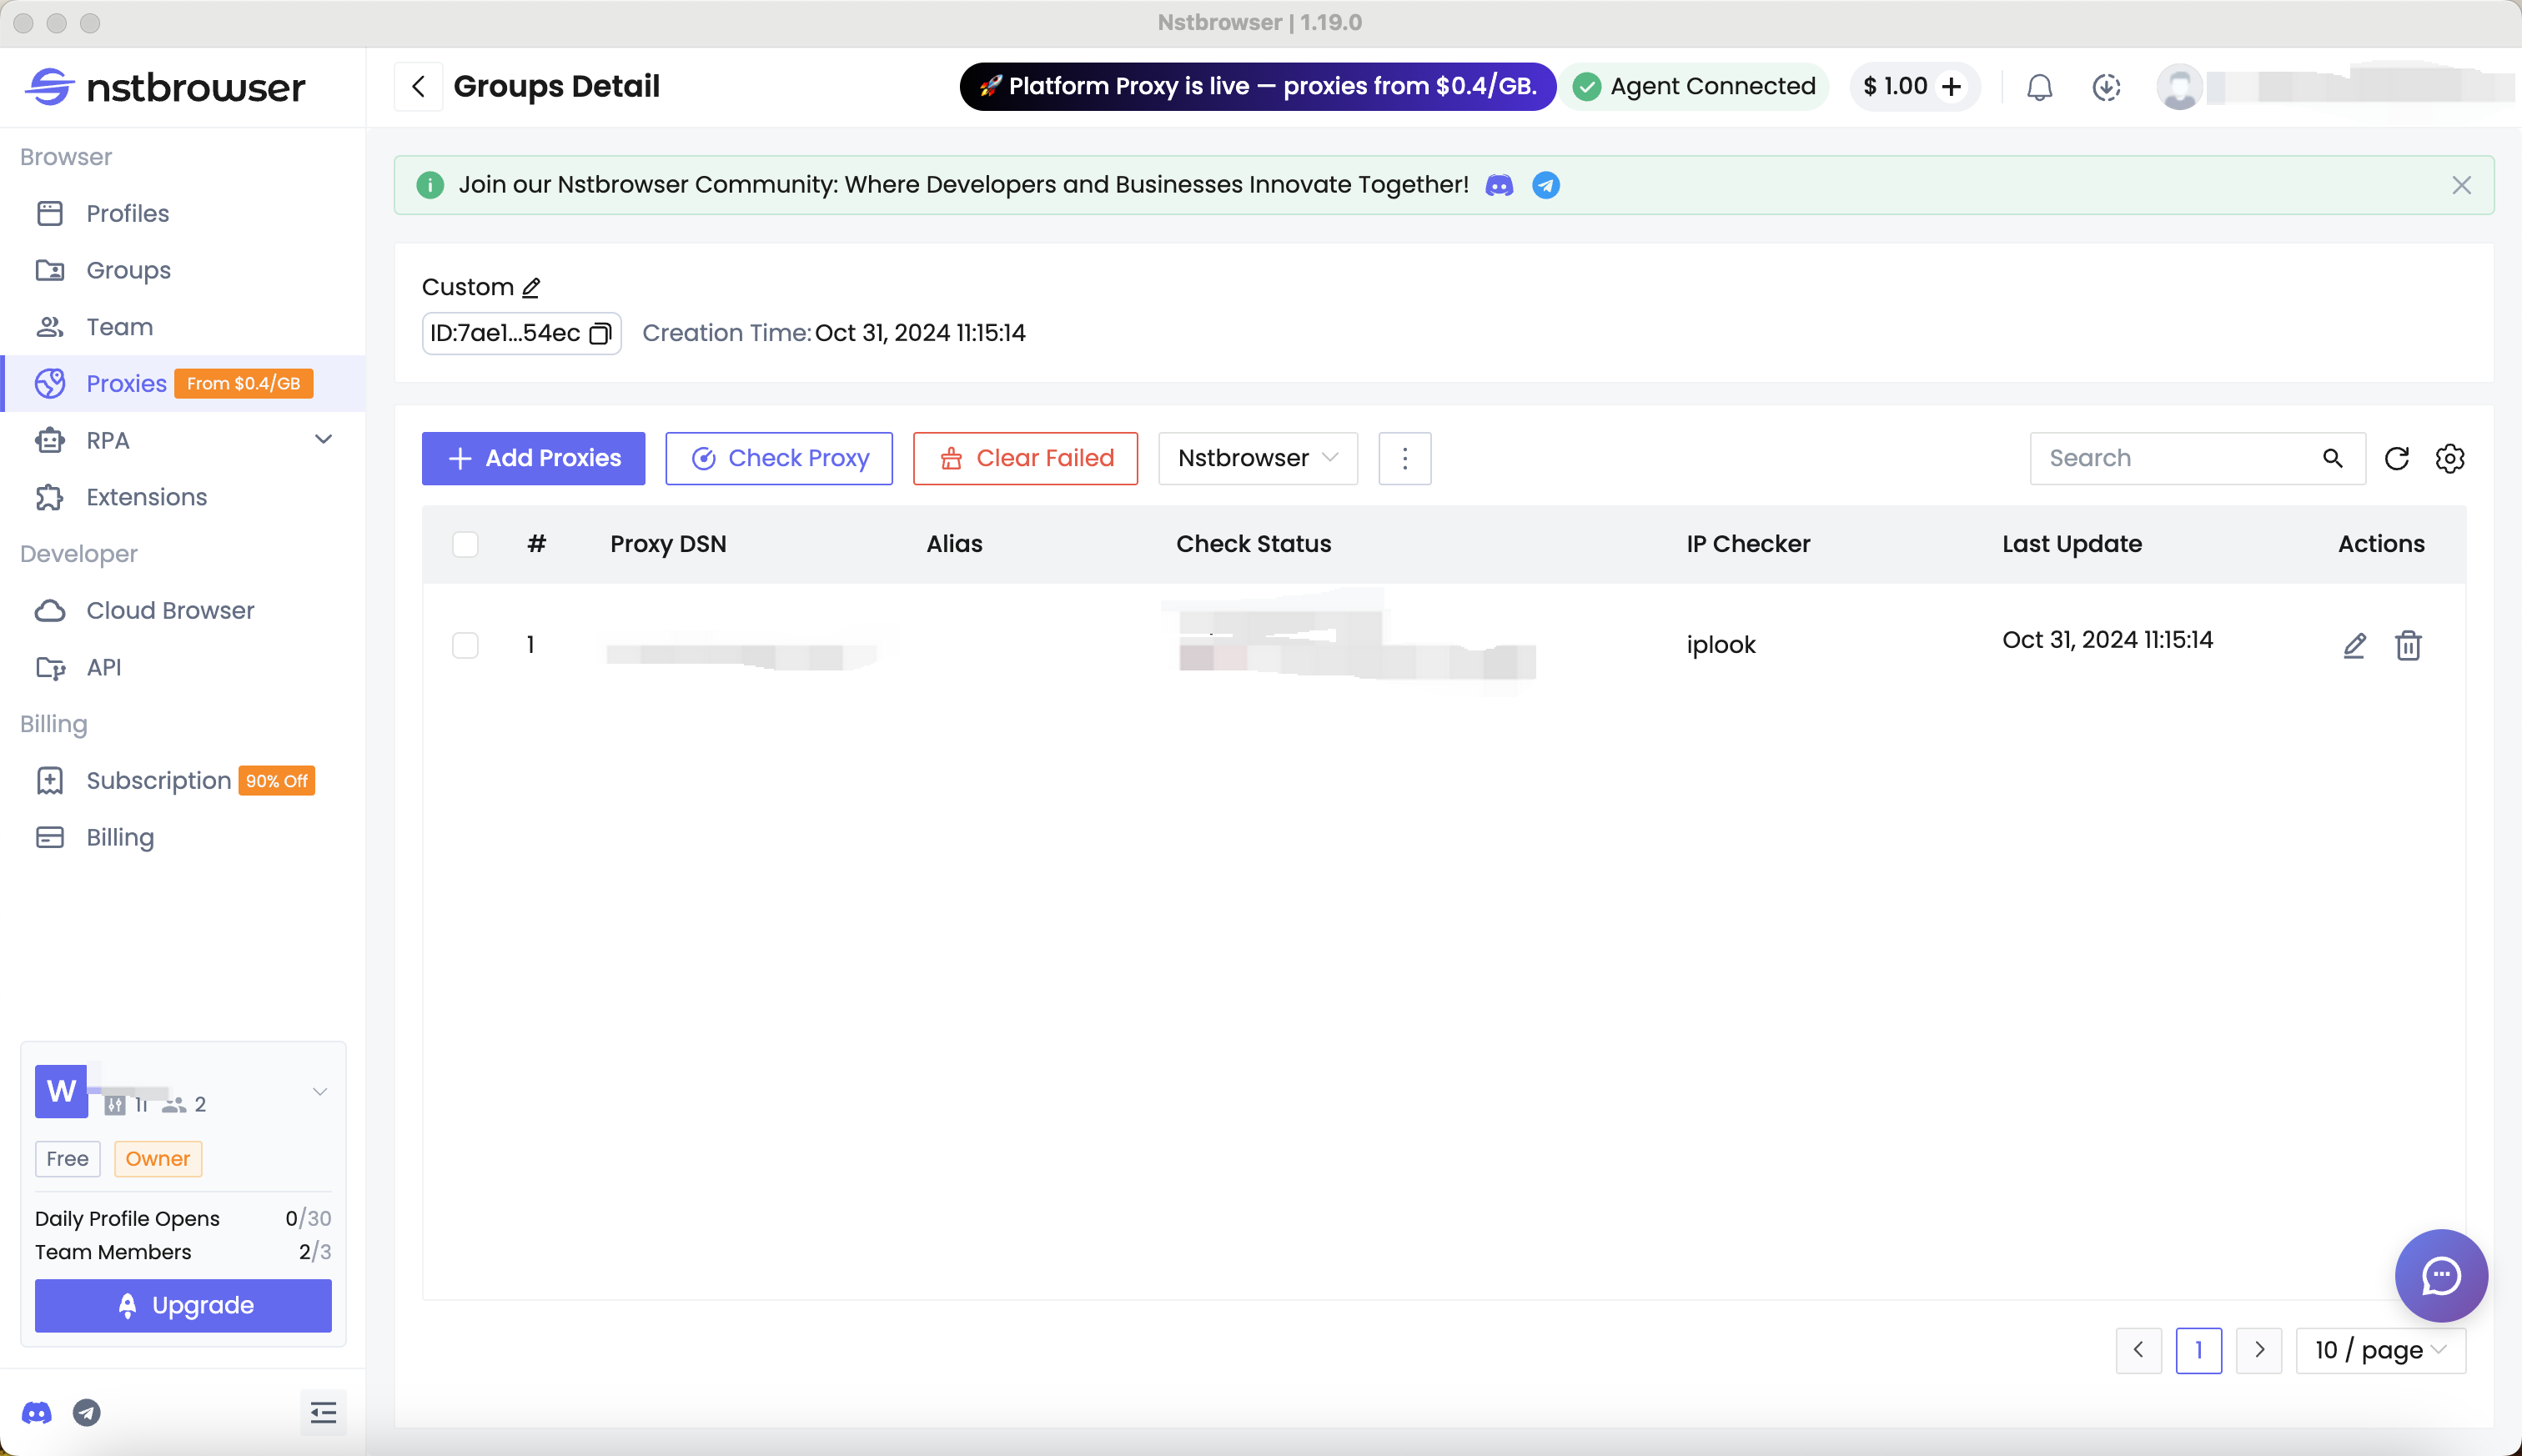
Addto add proxies into the current group, paste the proxy URL, and save. - Open the detail view of an added proxy to edit, delete, or check it.
Check Proxy: test added proxies and save the corresponding detection results.Clear Failed: remove all failed proxies in one click and keep only the successful ones and their results.- Check platforms: supports multiple proxy checking services, including
nstbrowser,iplook, andipinfo. - Batch operations:
- batch rename proxy groups
- batch move proxies to another group
- batch export proxies
- Add custom proxies:
- supports
HTTP/HTTPS/SOCKS5 - supports multiple import formats
- supports aliases such as
http://ip:port:user:pwd:alias
- supports
Use Local Proxy
- Do not use a proxy IP (choose
Local): when launching the environment, the target website is accessed through the current real IP address of your computer.
Note: if a VPN is enabled on your local system, the target website will use the IP assigned by that VPN.
